Goodness, that’s a lot of words in a title. I’ve been trying to make them as descriptive as possible. Now you can make it without a real recipe, right? (Poach pears in red wine, caramelize, make into tarte tatin (=pastry dough on top of the filling, into the oven, then flip over when golden))
I’ll give you some pointers anyway, just for fun.
I made this with a friend a few weeks ago—another friend has a Magical Pear Tree that even survived the first Storm in the beginning of November, and had given me a bunch of pears, and the friend I made it with had an idea of red wine poached pears, so we researched some recipes and it all came together. It’s quite a bit of work for the end result, but a fun afternoon activity. A friend is recommended though.
I had started my Pear Tart Adventures with Smitten Kitchen’s pear and almond tart, which was awesome (although the sugar in each component adds up). But unfortunately I forgot to take pictures of that journey. Besides, Deb has already documented it beautifully, so what good am I?
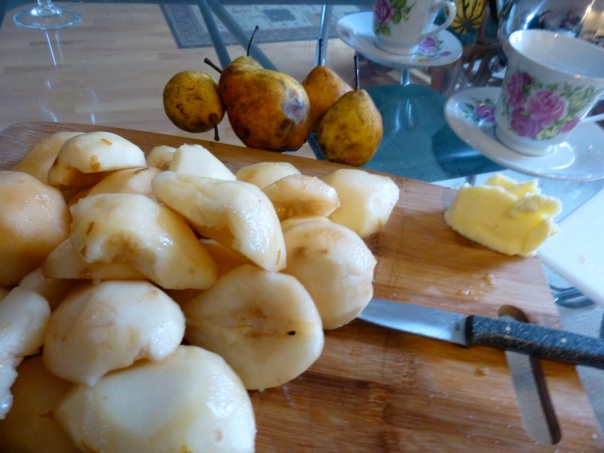
Many pear recipes involve poaching the pears before use. The pear and almond tart cited above poached them in sugar syrup; others have you do it in tea (such as Earl Grey), white wine, or (this one) red wine. Depending on the size, ripeness, and type of pears, they may take a little while to peel and core (we found that coring was much more tedious than peeling, which happened to be rather satisfying).
This recipe has a number of components; hence the friend recommendation. Projects are fun by oneself but time-consuming and can be a little tedious. Make a wine reduction, then caramel, mix in the wine reduction, add pears, cook, let cool, make crust (or use one you have in the freezer), top, bake, flip, cool, eat. Well. I guess most tarts have multiple parts: at least a crust, filling, and topping.
The original recipe is from Food and Wine, and we didn’t change too many elements. A few ingredients I didn’t have quite enough of (namely red wine and pear liqueur (one day, perhaps I shall be the kind of person who keeps pear liqueur on hand. Certainly not for a few years)). And a few processes were changed as well; the most significant is that the recipe calls for puff pastry. Puff pastry, granted, is pretty neat. And not a bad thing to have around. But, as you probably know by now, I am more into making my own things, and puff pastry is a lot of work. Fortunately, I had a pie crust in the freezer, thanks to some forethought. Turns out you can freeze homemade crusts too (I think that’s how store-bought ones come?)!—when I made pumpkin pie a while ago it seemed silly to only make a single crust, so I made a double crust, rolled out both, used one and froze the other.
Pie crust, and how to freeze it:
12 Tbsp butter (1 1/2 sticks)
~1/3 cup very cold water
2 cups flour (up to half whole wheat, preferably fine-ground, if you like)
1 tsp salt
Cut up the butter first and freeze it while you get everything else out. Throw some water in a cup and put that in the freezer too. Measure out flour and salt and mix together, then throw in the butter (I apparently like to throw my pie crusts together) and blend together quickly, either in a food processor, with a pastry blender, or your fingers (which is what I’ve been doing—just make sure the butter is very cold and work quickly, you don’t want it to melt). You should have roughly pea-sized chunks of butter, or a little larger smears, of course with a mix of sizes. Toss in a few tablespoons of the ice water and mix around—it may take a few times to be able to tell how much liquid the dough will need. You should be able to clump pieces of dough together and have them stick, but don’t let it get too wet, and don’t overmix or it’ll get tough (this is where a food processor is handy). Press together and separate into two rounds. Put in plastic wrap or a bag and refrigerate for an hour or so.
Clean a countertop and sprinkle with flour. Take the dough out and roll it out (if you don’t have a rolling pin a clean wine bottle works spectacularly) to something resembling a circle (size it to your pie pans).
Ready to use as is, or place between two sheets of wax paper and carefully roll up. I didn’t actually have any wax paper, so I took an old (clean) produce bag (one of the super thin kind of flaky ones), cut it up, and used that instead. Worked surprisingly well! Once rolled, place in another plastic bag and wrap it up completely before placing it delicately in your freezer (after it’s frozen you don’t have to be quite so fastidious). When you need to use it, remove from freezer and let thaw for an hour or two before unrolling.
I found that the frozen pie crust was actually flakier and more delicious than the one I cooked right away. Could’ve been imagining it—but other pie recipes have you freeze the dough before baking it; I always thought it was to prevent it from puffing up, so you don’t have to use pie weights, but it may have other properties as well. Things to be researched.
Caramel! That is another piece of this recipe (I told you there were a lot). Caramel is basically browned sugar. Actual caramels (the kind twisted up in wax paper squares) and made by cooking sugar until deeply golden and a very specific temperature (candy thermometers = super helpful), then adding cream and whisking like mad as it all bubbles up. That’s my experience, anyway. It’s fun, if a little messy. This tart is nice because you get the caramel flavor without going too crazy.
Finalement, le tarte Tatin. Allegedly named after the Tatin sisters, French of course, who forgot to put the crust in the pan before the filling in a tarte they were making, so they decided to bake it on top of the filling instead. Apple is traditional, but the process is what really makes it a tarte Tatin. N’importe quoi, c’est délicieuse.
Red Wine Caramel Poached Pear Tarte Tatin
2 cups red wine (I actually only had about 3/4 cup; it worked okay but I'm sure would be improved with more)
Cinnamon sticks, or 1 tsp ground if you don't have the sticks
1/2 cup sugar
1/4 cup water
2 Tbsp butter
Pears (we used at least 10 smallish ones)
1 pie crust, or a sheet of puff pastry (see above)
Start with the wine: boil with cinnamon until reduced and a little syrupy. This could take some time. Meanwhile, peel and core the pears, trying to get the stringy center bit out if you can.
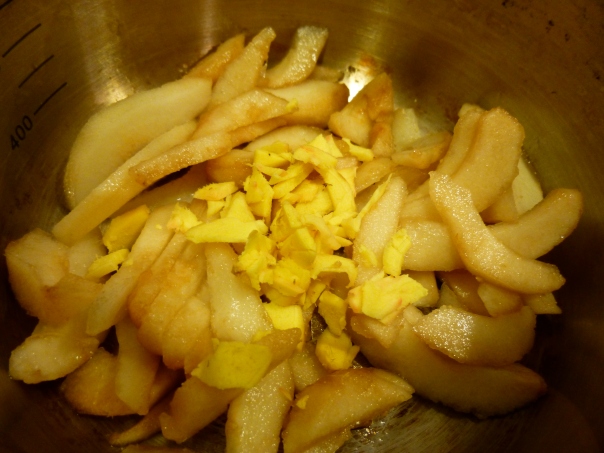
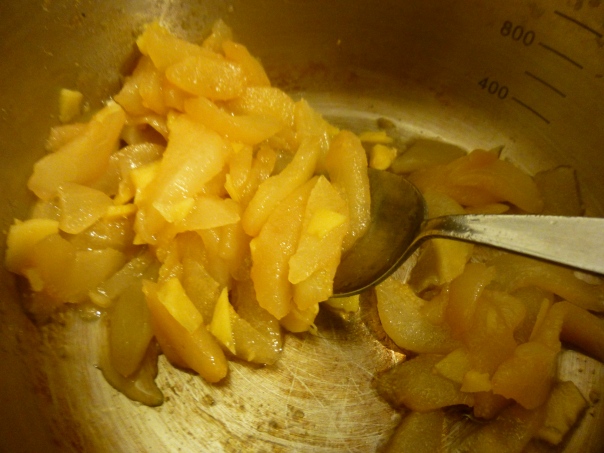
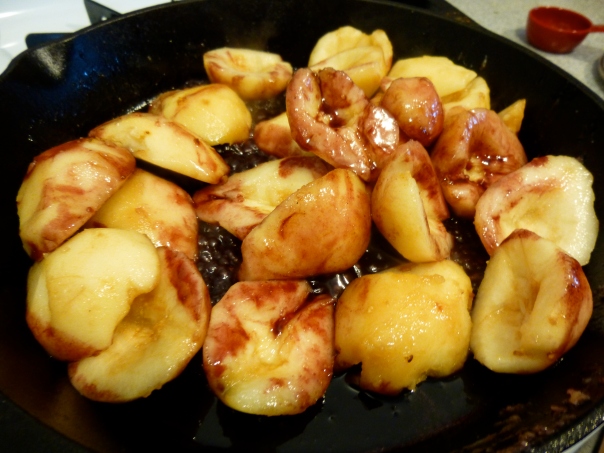
Mix the sugar and water together in an ovenproof pan, the one you’ll make the tart in. I recommend cast iron; I’d never caramelized sugar in cast iron before, and it is a little more difficult to see the color changes, so maybe choose something else your first time, but otherwise it worked great. Heat until a nice amber color, swirling or stirring occasionally (stirring can mess it up a little more easily, but this recipe is very forgiving). Add butter and red wine reduction, and dissolve any hardened pieces of caramel that will have formed. Add pears and cook covered at low heat, stirring or turning pears occasionally, until pears are tender—at least 20 min. Arrange the pears cut side up in the pan and let cool.
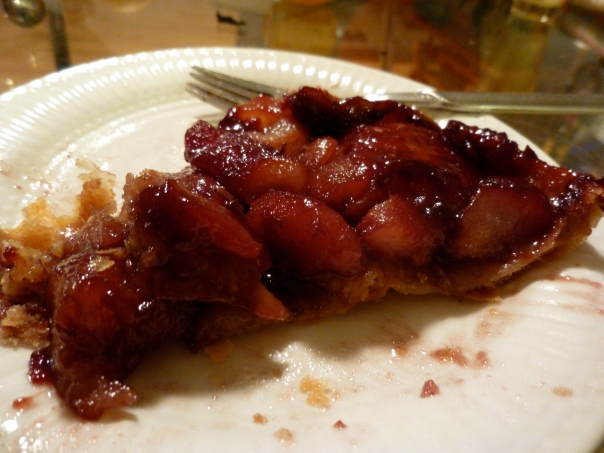
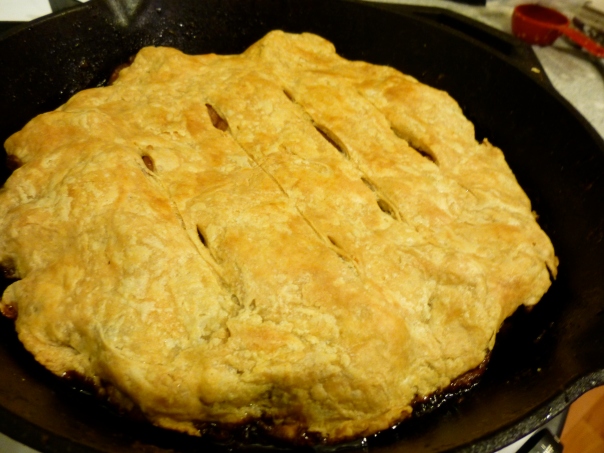
Preheat the oven to 375ºF. Unroll your pie crust and place on top of the pears. Tuck in the edges. Bake for about an hour, until the crust is beautiful and golden and smells delicious. Remove from oven and let cool for 10ish minutes, then flip over. This is a little tricky, and I admit that we had a bit of trouble with it. Just be quick and confident, and don’t be afraid to rearrange if it gets messed up. No one will ever know, Julia Child style (although apparently she never actually dropped a chicken).
The recipe from Food and Wine said it serves 8. Incorrect. We polished off half of it right then, and split the rest to take home. I ate it for breakfast.